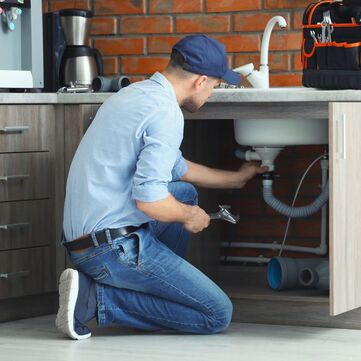
 The Science Behind Your Plumbing System: A Deep DiveEver turn on a faucet and marvel at the instant flow of water? Or flush a toilet and wonder where all that waste goes? It might seem like magic, but there's some fascinating science behind your home's plumbing system. Today, we'll delve into the fundamental principles that keep your water flowing smoothly and your waste disappearing.
1. The Force of Gravity: Nature's Drain CleanerImagine your plumbing system as a giant water slide. Gravity is the main driver of the "drainage" side of plumbing. Waste and wastewater flow downhill due to gravity, propelled by the difference in elevation between your fixtures (sinks, toilets) and the sewer line or septic tank. This is why drainpipes are strategically sloped downwards, ensuring a smooth and efficient flow. 2. Pressure Makes Perfect: Delivering Water Where You Need It: Water doesn't just magically appear in your faucet. It's delivered under pressure, typically from a city water main or a well pump for private residences. This pressure pushes the water through the pipes and overcomes any resistance, ensuring a consistent flow throughout your home, even on higher floors. 3. The Magic of Siphoning: Keeping the Bad Smells Out: Have you ever noticed the U-shaped bend under your sink's drainpipe? That's called a P-trap, and it utilizes a scientific principle called siphoning. The water trapped in the P-trap acts as a barrier that can prevent sewer gases from entering your home through the drain. Every time you use your sink, the water fills the P-trap, creating this crucial seal. Toilets also use siphoning action during a flush, effectively removing waste and replenishing the water in the bowl to maintain the seal. 4. Venting: Keeping the Flow Going: Imagine a kinked hose - that's what can happen to your drainage system without proper venting. Vents are vertical pipes that allow air to enter and escape the drainage system. This helps maintain equal air pressure within the pipes, preventing clogs and ensuring smooth water flow. Without proper venting, the draining process can become sluggish or even back up. 5. Material Matters: Building a Reliable System: Modern plumbing systems rely on various materials, each chosen for its specific properties. Copper pipes offer durability and can provide resistance to corrosion. PVC pipes are lightweight and cost-effective, ideal for drainage systems. PEX tubing is flexible and can withstand high pressures, making it a popular choice for hot and cold water lines. Understanding the science behind these materials helps plumbers design and install a system that functions optimally and lasts for years. Bonus! The Bernoulli Principle: A Splash of Physics The Bernoulli principle is a fascinating concept that plays a subtle yet important role in plumbing. The Bernoulli principle states that as the velocity of a fluid increases, its pressure decreases.* It can explain the phenomenon of a faucet aerator, which mixes air with water to create a higher velocity flow, resulting in a feeling of increased water volume while actually using less water. We hope this blog post was fun and helped you gain a new appreciation for the intricate dance of your plumbing system. The next time you turn on a water or flush the toilet, remember - it's not just about convenience, it's a testament to the power of science working wonders behind the scenes! *Science in Sweatpants: Exploring the Bernoulli Principle. https://www.fox7austin.com/news/science-in-sweatpants-exploring-the-bernoulli-principle *Water Wiggle: Discover the Power of Hydrodynamic Fun - Smart Learning Approach. https://smartlearningapproach.com/water-wiggle/
0 Comments
 Believe it or not, the history of plumbing stretches back thousands of years, evolving from basic sanitation practices to the complex networks that grace our modern homes. Let's take a trip down the drainpipe of time and explore some key milestones:
Early Civilizations (4000 - 1000 BC): Even in ancient times, people recognized the need for proper waste disposal. The Indus Valley Civilization (modern-day Pakistan and India) used some of the earliest plumbing systems, with terracotta drains and even toilets in some palaces. Roman Empire (52 BC - 476 AD): The Romans are often hailed as the pioneers of advanced plumbing. They built elaborate networks of aqueducts that transported water from faraway sources to cities and towns. They used lead pipes for distribution and even had public bathhouses with sophisticated drainage systems. However, the reliance on lead pipes for drinking water later had negative health consequences. The Dark Ages (500 - 1000 AD): Following the collapse of the Roman Empire, much of the plumbing knowledge was lost, leading to a decline in sanitation and public health due to concerns about waste disposal. Medieval Times (1000 - 1500 AD): Castles and monasteries began incorporating rudimentary plumbing systems. These often involved garderobes (medieval toilets) that emptied into moats or cesspools. The Renaissance (14th - 17th Centuries): Renewed interest in hygiene and sanitation led to advancements in plumbing. Cast iron pipes replaced lead for some applications, and flushing toilets were invented (although widespread adoption was slow). The Industrial Revolution (18th - 19th Centuries): The rise of cities created a growing need for efficient sanitation systems. Public water supplies and sewer systems began to emerge in major cities. 20th and 21st Centuries: The invention of modern materials like PVC pipes, along with advancements in indoor plumbing fixtures, revolutionized home plumbing systems. Today, we enjoy features like instant hot water heaters, low-flow toilets, and even smart home devices that monitor water usage. The Future of Plumbing: Sustainability is a growing concern, and future plumbing systems are likely to focus on water conservation and resource efficiency. We may see advancements in rainwater harvesting, greywater reuse, and even self-repairing pipes. The next time you turn flush the toilet or turn on your faucet, take a moment to appreciate the long and fascinating history of plumbing that has brought us to this point. From the ingenuity of the Romans to the innovations of the modern era, plumbing has played a vital role in shaping our civilization and improving public health.  As a homeowner, facing a minor plumbing issue can be frustrating, but having a few essential tools can help you tackle some fixes yourself and save money on a plumber. Here's a list of the essential plumbing tools every homeowner should consider having on hand:
Plungers:
 As the flowers bloom in the Midwest, it's time to shift our focus to springtime maintenance tasks around the home, including our plumbing systems. Winter can be harsh on pipes and fixtures, so giving your plumbing some TLC is essential to ensure everything is in top shape for the warmer months ahead. In this blog post, we'll provide a comprehensive spring plumbing maintenance checklist to help you prepare your home for the season.
Inspect Outdoor Faucets and Hoses:
*Essential Plumbing Tips: Maintaining Your Home’s Vital Systems | Pirdu. https://pirdu.com/essential-plumbing-tips-maintaining-your-homes-vital-systems/ 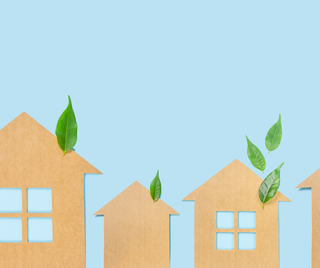 Looking for ways to save water and energy in your home, while improving your environmental impact and potentially lowering your utility bills? Here are some things you can do:
Water Conservation:
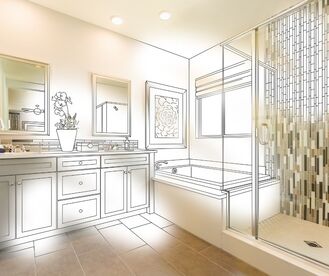 Choosing the right plumbing fixtures and upgrades for your bathroom remodel can be overwhelming, but it's an exciting step towards creating your dream bathroom. Here are some key factors to consider to ensure you make the best decisions:
Function and Needs:
 The New Year is here! What better way to ring in the new year than with a smoothly functioning plumbing system? Here are some tips to help you tackle those pesky plumbing issues and ensure your pipes are happy and healthy in the new year:
Resolution #1: Tackle those lingering leaks:
By following these simple tips, you can ensure your plumbing system runs smoothly throughout the new year. Remember, taking care of your pipes today saves you time, money, and stress in the long run. So, raise a glass (of water, of course!) to a fresh start and happy plumbing in the new year!  Winter's icy grip can wreak havoc on your plumbing system in the Twin Cities, leading to frozen pipes, burst lines, and costly repairs. With a little preparation and some proactive steps, you can keep your pipes happy and your home warm throughout the season. Here are some essential winter plumbing tips to prevent frozen pipes and keep the water flowing:
Insulate Exposed Pipes:
Bonus Tip: Consider installing a freeze alarm on vulnerable pipes to alert you if the temperature drops to a dangerous level. By following these winter plumbing tips, you can minimize the risk of frozen pipes and ensure your home's plumbing system operates smoothly throughout the cold season. Remember, prevention is key! By taking proactive steps, you can avoid costly repairs and enjoy a worry-free winter. We’re always here to help!  The holidays are a time for joy, celebration, and togetherness. But they can also be a time for clutter and chaos. After all the presents have been opened, the feasts have been eaten, and the guests have gone home, you're left with a house that needs some serious TLC.
Don't fret! With a little planning and effort, you can get your home back in order in no time. Here's a step-by-step guide to holiday clean up: 1. Assess the damage The first step is to take a look around your home and assess the damage. What needs to be cleaned, organized, or decluttered? Make a list of all the tasks that need to be done, and prioritize them based on importance. 2. Start with the big stuff Once you have your list, start with the big stuff. This includes things like taking down decorations, putting away wrapping paper and gift bags, and cleaning up any spills or messes. 3. Declutter and donate The holidays are a great time to declutter your home. Go through your belongings and get rid of anything you no longer use, need, or love. You can donate these items to charity, sell them online, or give them away to friends and family. 4. Clean and organize Once you've decluttered, it's time to clean and organize. This includes dusting, vacuuming, mopping, and putting away any stray belongings. Take some time to deep clean areas that may have been neglected during the holiday rush, such as the kitchen, bathrooms, and bedrooms. 5. Don't forget the outside Your holiday clean up shouldn't just be limited to the inside of your home. Take some time to tidy up your outdoor spaces as well. This includes things like raking leaves, putting away patio furniture, and cleaning up any holiday decorations that may have been left outside. 6. Reward yourself Once you've completed your holiday clean up, take some time to relax and reward yourself. You've earned it!  Wondering what you should really tackle while the weather is still in nice in the Twin Cities... you know before we get snow? Here are some things to consider to help keep your plumbing working great this season:
Here are some additional tips:
|
AuthorAt Tony's Plumbing & Heating, we offer outstanding residential and commercial plumbing and heating services in the East Twin Cities metro. With our blog, we hope to bring you useful tips and tricks for ever day life! Archives
June 2024
Categories
All
|
 RSS Feed