Tonys Plumbing and Heating
  • Home
  • About
  • Services
  • Contact
  • Testimonials
  • Blog
Picture
Serving the Twin Cities East Metro & Surrounding Suburbs with Expert Plumbing Services

Call now

How to Use a Plunger the Right Way: A Step-by-Step Guide from Tony’s Plumbing and Heating

2/10/2026

0 Comments

 
PicturePhoto courtesy of Canva
A clogged drain or overflowing toilet always seems to happen at the worst possible time. But before you panic, grab your plunger! It's one of the most effective (and underrated) tools in your home.
At Tony’s Plumbing and Heating, we’ve unclogged just about everything—and we’re here to share how to use a plunger properly so you can handle small clogs like a pro.

First, Choose the Right Plunger
Not all plungers are the same! There are two main types:
1. Cup Plunger (Flat Bottom)
  • Best for sinks, tubs, and showers
  • Flat rubber cup, ideal for creating a seal on flat surfaces
2. Flange Plunger (With Extra Rubber Flap)
  • Designed for toilets
  • The extra flap fits into the toilet drain for better suction
If you're trying to unclog a toilet with a cup plunger—it won’t work nearly as well!

Step-by-Step: How to Use a Plunger
Whether it’s a sink or toilet, here’s how to plunge effectively:

1. Add Water If Needed
There needs to be enough water in the bowl or basin to cover the plunger’s cup. This helps create a strong seal.

2. Create a Tight Seal
Position the plunger directly over the drain and press down gently to force out the air. Then, firmly press and pull the plunger up and down--without lifting it off the surface.

3. Plunge with Force
Use strong, quick thrusts for 15–30 seconds. You're creating suction and pressure to dislodge the clog.
​
4. Test the Drain
Remove the plunger and check if the water drains. If not, repeat the process. Some clogs take a few rounds.

What Not to Do
  • Don’t use chemical drain cleaners before plunging—they can splash back and cause burns.
  • Don’t plunge a sink with a garbage disposal without unplugging it first.
  • Don’t give up too soon—persistent plunging often works!

Clean Up
After the clog is cleared, clean your plunger with disinfectant and hot water. It’s a good idea to store it in a bucket or container for sanitary storage.

Still Clogged? Call Tony’s Plumbing and Heating
If you’ve tried plunging and nothing’s working, or the clog keeps coming back, it might be a sign of a deeper issue—like a blockage in your sewer line or buildup in your pipes.

We’re here to help with:
  • Stubborn toilet clogs
  • Backed-up sinks or tubs
  • Drain cleaning and inspection
  • Whole-home plumbing maintenance
Give us a call and we’ll get things flowing again—fast, clean, and done right.

0 Comments

How Toilets are Put Together

12/29/2025

0 Comments

 
It can be confusing when you’re doing a little DIY plumbing, so we put together some information for you to understand the basics of your toilet. What are all the pieces and parts? If someone says, “your flapper may not be sealed”, do you even know what a flapper is?

A toilet has two main parts, the tank and the bowl. The tank holds all the “plumbing” so to speak. It has all the bits that make the toilet flush. This includes the fill valve, the flush valve, the flapper, and the float. And of course the bowl is the part you sit on. 

Toilet tank components
  • Toilet/flush handle: The lever on the side of the tank that you push or pull to flush. A dual-flush toilet will have buttons on the tank lid. (There is a dual flush tank that has two buttons on top that can release different amounts of water.)
  • Trip lever:  Connected to the toilet handle on the outside of the tank and connected to the flapper by a chain. When you push down on the toilet handle, it will pull the chain, breaking the seal and allowing water to “flush” the bowl. 
  • Chain: Connects the flush handle to the flapper.
  • Float ball: Looks like a ball that floats on the water's surface to signal the fill valve to stop the flow of water once it reaches the correct level.
  • Fill valve/ Ballcock:  This controls the flow of water into the tank and refills it after the toilet is flushed.
  • Flush valve/gasket: A large opening at the bottom of the tank that is sealed by the flapper valve.
  • Flapper Valve: Seals the flush valve, so the tank can fill with water. It’s like a plug.  When the toilet is flushed, it lifts up to let water rush into the bowl.
  • Overflow tube: A vertical tube that prevents the tank from overfilling and therefore overflowing out of the toilet.
  • Supply line: A flexible hose that connects the toilet to the water supply line on the wall. 
  • Stop valve/Shut off valve: Attached to the water supply line on the wall,  this valve can turn the water off and stop the flow into the toilet tank.
Toilet bowl components
  • Seat and lid
  • Rim: The top edge of the bowl that has small holes underneath to allow water to flow in and rinse the bowl.
  • Trapway: The S-shaped pipe at the bottom of the bowl that carries waste into the drain.
  • Siphon jet: A jet of water that clears the trapway.
  • Closet flange: A fitting that connects the toilet and seals to the waste pipe. 
Use this as a guide to understand how a toilet works. Hopefully this understanding will help you maintain your toilet when necessary. And when things are beyond your own skills, give us a call at Tony’s Plumbing and Heating and we can get your toilet flushing again in no time.

0 Comments

So There's a Chip In Your Porcelain Throne

1/19/2021

0 Comments

 
Picture
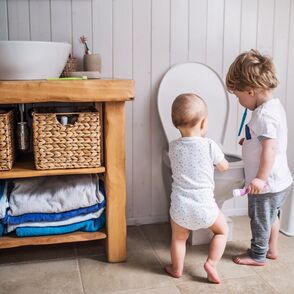
There’s always a distinct feeling of dread when you notice a chip or crack in the porcelain at home. Commercial epoxy fillers, chip repair kits and refinishing products are available for easy and simple repairs to small dings and damage. These products are handy ways to keep the costs down as long as there are only minor issues. But, how do you know when it’s time to replace the toilet, or simply repair it? 

Toilets last a long time, and especially when cared for properly, you can’t look at a toilet and know how old it is. So, if you’ve started to have issues with your toilet there are a few signs to look out for that will show you whether you should replace or repair it. The first thing to contemplate when considering replacing a toilet, is the actual number of issues.  Write them out, and then think about the time you’ll need to invest in the toilet to repair it. If there are a couple of chips and the toilet set needs to be replaced, that’s one thing. But if there is a crack, the flip valve is busted and it’s leaking...maybe it’s time to consider giving Tony’s a call.  

Does your toilet shift when you sit on it? This is a clear sign the toilet needs to be replaced. Toilets should never shift if sat on, it could be a sign that the toilet is improperly sealed. You can attempt to tighten the bolts on either side of the toilet, but if this does not fix the issue contact a plumber immediately. 
If your water consumption is incredibly high, your toilet could be the cause. If you’ve noticed that your water use is high at home, it could be beneficial to invest in a low-flush toilet. Low-flush toilets use an average of 2 gallons per flush, while typical toilets can use somewhere between 3-5 gallons. Frequent clogs are also a sign that your toilet is getting on in age, which can be common in older or low-flush toilets. If you have to plunge the toilet weekly or more, it could mean that it’s no longer working efficiently. 
​

Being a homeowner comes with a laundry list of responsibilities. You need to think about things like energy efficiency, when the bathroom was last caulked and whether that eerie thud in the pipes is a problem worth fixing. Minor damages are bound to happen in any well lived space due to typical wear and tear, but sometimes minor damage crosses over to major fairly quickly, and almost always when we are least expecting it. Not everything requires a professional to replace, however, this laundry list can become expensive fast. If you’ve got questions about an ill functioning toilet not answered in this list, call us, your favorite local Minnesota plumbers Tony’s!  


0 Comments

November 13th, 2020

11/13/2020

0 Comments

 
Picture
Few people do this, but have you ever read the instructions on your cleaning products? If you’re using disinfectants, they need to sit on the dirty surface and soak to be effective. This means any time you have sprayed and swiped; you’ve actually just pushed the germs around! Cleaning high trafficked areas has never been more important than it is in today’s world. The busiest place in any given household? The bathroom.

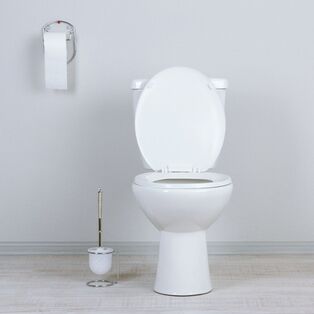
Cleaning your bathroom is an important part of a healthy home. The toilet is something every person in your home will touch at one point or another, so it needs to be cleaned regularly, and properly. Using a strong disinfectant will ensure you are getting rid of any bacteria that might be hanging around. You need to make sure that your toilet is clear and free of any debris before you spray any disinfectants on and allow them to then soak. Lysol cleaning spray instructions state they need to soak for ten minutes to be effective! 
​
You need some important items to clean a toilet properly:
  • Gloves
  • Toilet bowl cleaner
  • Bristled brush
  • Towels

The first step to thoroughly cleaning a toilet is going to be clearing away any items surrounding the toilet. Remove all rugs and items that may be sitting behind it and clean them, as flushing the toilet will cause bacteria to spray outside of the bowl. It is unsanitary to keep items too close to the toilet. In small and large bathrooms alike, it is always a good idea to flush the toilet with the seat down, and make sure you clean any items that are spending time in the area. 

After removing extra items surrounding the toilet, use a rag or paper towels to do a cursory wipe down and remove any dust around the toilet. Spray the toilet, and surrounding area with your disinfectant and turn your attention elsewhere while your product does its job. Lift the toilet seat and pour in your cleaning solution allowing it time to soak as well. 

Once you have allowed the product to fully saturate the toilet, use the bristled brush to scrub the inside of the toilet. It is important to make sure you scrub under the rim inside the toilet bowl, as debris can build up keeping your toilet filthy no matter how clean the rest of it becomes. Sponges, old toothbrushes, and bristled brushes are great tools for getting into the cracks and grooves of any tile grout or crevices near the toilet. After you’ve scrubbed every inch, wipe the toilet down with a wet towel or some paper towels.

Cleaning the bathroom is not a glamorous chore, no matter how you spin it. We all know how nice it is to have a thoroughly cleaned bathroom. This is one of the most used places in the home, so it is important to clean all areas that are frequently touched. The toilet is a place everyone uses, and if you live in a home with multiple people it’s important to keep up on how often you clean both that toilet and bowl. 
 

0 Comments

The Things We Flush

4/16/2020

2 Comments

 
Picture
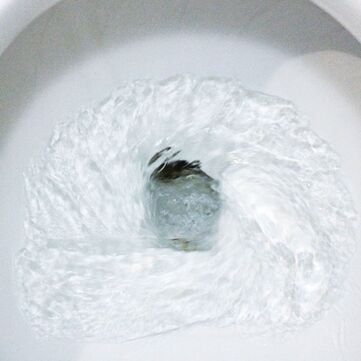
The plumbing inside your home is a delicate system. It only works as well as you take care of it, and since it’s just some plumbing - it’s often easy to forget what proper care looks like. Take the toilet for example. You use it every day, right? That toilet is connected to piping, drainage, sewer or septic tanks depending on the waste management system. It’s a long process, and it’s important to know what you’re sending down the line.

Contrary to common understanding, there are numerous items that are thought to be appropriate to flush that are actually bad for your toilet. We see it in movies, on TV, and read about it in books. We flushed our first guppy after a moment of silence for their passing, and tossed a used tissue in the bowl, neither of which belonged there! This list is brief, but covers the most common items we’ve unfortunately found inside the pipes. 
  • Paper towels & Tissues. The only paper that should go down your toilet is toilet paper. Paper towels and tissues are both a paper substance, but they are not created to break down the same way as toilet paper. 
  • Wipes. These especially, are a much thicker material than toilet paper and are not compostable. It does not matter if you have all natural wipes, baby wipes or cosmetic wipes, they do not belong in the toilet. Wipes are one of the leading causes of major blockages in urban sewage systems, so please, for everyone’s sake - do not flush wipes!Tampons and cotton swabs. These two items are considered to have paper like qualities, but they still can’t be flushed down the toilet.
  • Tampons can cause sudden obstructions inside piping, and cotton does not break down well. Neither tampons or cotton balls belong inside the toilet, and do best thrown in the trash.
  • Condoms. These are not biodegradable, and do not belong in our waterways. If you need to dispose of a condom, throw it in the trash and not down the toilet!
  • Medication of any kind. This one is purely on account of the medication polluting the wastewater. They do not belong in our water, and if you do not need them dispose of them responsibly. 
  • Cooking oil. This one should not surprise you. Cooking oil belongs in the trash, it should not go down the sink drain, or shower drain, or down the toilet! The oil may be hot going down, once it’s inside your cold plumbing it will cool and solidify, creating a massive clog inside your pipes!

​If you’re flushing any of these items down your toilet, please think twice. The only things that should be flushed down the toilet are human waste, and toilet paper. Not only are you polluting your local water systems, but you’re actually damaging your own plumbing! Consider the environment, and your wallet the next time you flush. We know that people make mistakes, so if you’ve accidentally flushed something down the toilet and created a clog we are here to help. 


2 Comments

    Author

    At Tony's Plumbing & Heating, we offer outstanding residential and commercial plumbing and heating services in the East Twin Cities metro. With our blog, we hope to bring you useful tips and tricks for ever day life! 

    Categories

    All
    Back Flow
    Backflow Testing
    Back To School
    Bathroom
    Bath Tub
    Bathtub
    City Water
    Cleaning
    Clogged Drain
    Dishwash
    Dishwasher
    DIY Plumbing
    Emergency
    Entertaining
    Fall
    FAQ's
    Faucets
    Frozen Pipes
    Garbage Disposal
    Hard Water
    Heated Floring
    Holiday Season
    Home Hacks
    Home Owner
    Home Tips
    Hot Water
    Hot Water Heater
    Kitchen
    Leaks
    Leaky Toilet
    Maintenance
    Mold
    Moving
    New Year
    Outdoor
    Plumber Tool Kit
    Plumbing
    Plumbing Myths
    Remodel
    RPZ
    Save Money
    Science
    Sewer Lines
    Spring
    Stillwater Minnesota
    Sump Pump
    Things To Do
    Toilet
    Toilet Problems
    Valentines Day
    Water Damange
    Water Heater
    Water Pressure
    Water Softener
    What's That Noise
    White Bear Lake Minnesota
    Winter

    RSS Feed

Our Location:
​

661 Hayward Ave N
Oakdale, MN 55128


What Our Clients Are Saying:

"I have hired Tony's Plumbing for two significant projects at my home this year & have been very satisfied with the work. His team is experienced, friendly, arrives on time and the workmanship has been outstanding. I would highly recommend Tony's Plumbing for your next plumbing job!" Dan L. 

​"​Tony was extremely polite, worked with a sense of urgency, and went out of his way to give extra advice and help me understand what was going wrong with my pipe! Great job" Eddie C

Contact Us

651-340-1259
Site Map
Woodbury MN Services
Oakdale MN Services
​
License #PM063821
  • Home
  • About
  • Services
  • Contact
  • Testimonials
  • Blog