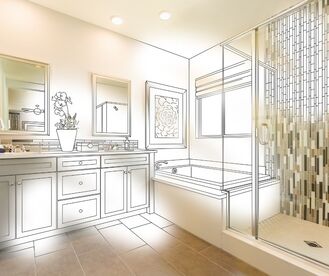
 Choosing the right plumbing fixtures and upgrades for your bathroom remodel can be overwhelming, but it's an exciting step towards creating your dream bathroom. Here are some key factors to consider to ensure you make the best decisions:
Function and Needs:
0 Comments
 Are you a bath bomb user? Many people love using them to relieve stress or just have a sweet-smelling bath, but can it cause problems with your plumbing? That’s a great question.
Depending on the ingredients of your bath bombs, you might be left dealing with a clogged drain in your bathtub. Luckily, Tony’s Plumbing and Heating is here to help! Check the Ingredients Most bath bombs are made with salts, oils, and scents to help create a relaxing, yet fragrant spa-like experience. They can contain Epsom salt or baking soda to help soothe your sore muscles, which both dissolve well in water. Some of the other ingredients like cornstarch, essential oils, cocoa butter, essential oils, and glitter. Glitter never goes down the drain well. In addition to that, some of the ingredients that don’t dissolve well in water can leave behind a residue in your tube, as well as cling to the walls of the pipes in your home. As time passes, these ingredients can build up and collect other things like hair and soap to cause clogs. Keeping Your Pipes Clear If you want to keep using bath bombs, we think that’s a great idea! Don’t give up a little “me time” because you might get a clogged pipe or drain over time. Here are a few simple steps to keep those clogs and pipes clear:
Pretty simple steps to keep enjoying your bath bombs whenever you need a little stress relief! Of course, if you do find yourself with a clogged drain that just won’t budge, we’re here to help. 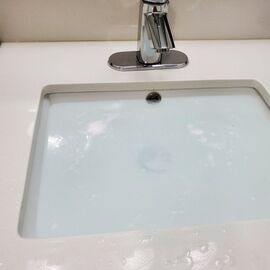 Ewwwww… gross. There is a hair clog in your drain. This might be one of the most wretched tasks that one might have to accomplish. If you have ever cleaned out a hair clog in a drain, you know that it looks gross, smells gross, and is wretch-inducing. So, to avoid having to perform this task, let’s talk about how to prevent the hair from clogging up in the first place. You’re probably not going to remove the source of the hair-causing clogs (i.e. family members and yourself) from your home, so let’s focus on your plumbing.
Before taking a shower or bath, clean any loose hairs you see laying on the base of the tub and shower and throw them in the trash can. The same goes for the bathroom sink. This helps reduce the amount of hair that can end up down the drain. Add a protective screen, such as a drain cover for over and under your drains. This will catch the hair and prevent it from going down the drains, we suggest the drain covers that are specifically designed to trap hair. Remember to clean the cover regularly by removing the hair and placing it into a trash can. You can also try flushing all of your drains at once, sending a torrent of water to clear up the hair and debris. Several people will have to coordinate for this task. Close all the drains including the bathtub and shower and sinks, and then fill each one with warm water. Have someone standing by each one of your drains and toilets, then coordinate your water attack! Have everyone open the drains and flush all the toilets at the exact same moment. This could flush all the debris out of the pipes, but if this fails, further cleaning of the pipes will need to be done. If these preventative measures don’t quite do the trick, and you still have water that won’t drain, here’s how to clean the clog. If you can see the clog, try removing it with your hands or a bent wire hanger (they also sell plastic, barbed drain-cleaners instead of using a wire hanger). If this doesn’t clear the drain, then you can try a chemical drain cleaner from the store, or you can try this natural solution. Pour ¾ cup of baking soda into the drain, and then pour ½ cup vinegar down the drain after the baking soda. Then plug the drain for about 30 minutes, then pour boiling water down the drain. Look to see if you can see the drain is clear and run water for about five minutes to see if this did the trick. If the clog still persists, you might need to bring in the professionals. Give us a call at Tony’s Plumbing to help with your clogged drain needs!  When it comes time to upgrade your main bathroom, you will most likely be very excited to redecorate and pick out all the pretty stuff you’ll see in the bathroom. But the biggest concern should be upgrading your plumbing, so your bathroom functions properly and you don’t have to worry about any issues down the road.
When you decide to remodel your main bathroom, one of the first things to think about is what kind of fixtures you are going to install and what kind of plumbing you need to support that. Whether it’s adding jet spray shower panels or a bidet, these are the types of items that will need additional plumbing. Plan out what types of fixtures you’re adding to your bathroom, and plan for a larger budget for the additional piping that may come with it. Even if you’re not adding new items to the bathroom, you may have to replace or repair your pipes. Especially with older homes, pipes could be rusted or rotted out where you can’t see it until you’ve torn out your old bathroom fixtures. So there may be some additional pipe replacement. This also leads to the opportunity to upgrade your pipes with a 2 inch drain for faster drainage. The standard drain sizes are a half inch to three-quarters inch smaller than a 2 inch drain, and by increasing the size of the drain even minimally, will speed up the drainage in your new bathroom. This is very beneficial if you have multiple members in your household. Also consider installing anti-scald devices that can add cold water to the hot water coming from the water heater to prevent scalding hot temperatures on your skin. Or now may be the time you want to also upgrade your hot water tank to a tankless system. With this, you can control the highest temp that your water will come out of your faucets, which can also prevent scalding. With your upgrade on the new bathroom, you can also add a water softening system if your home has hard water. When you’re ready to tackle your main bathroom remodel, give us a call at Tony’s Plumbing and we’ll get your bathroom all set for your beautiful new bathroom. 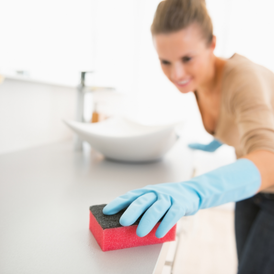 Cleaning bathroom. Photo courtesy of canva. Cleaning bathroom. Photo courtesy of canva. If you have unsightly stains on your bathtub, sink, or toilets, it could be rust. These rust stains can be caused by a number of things, but it’s more often that your galvanized pipes have accumulated rust that is caused by hard water leaving residue of iron and minerals behind. Here’s some easy ways to clean them up for a like-new sparkling bathroom.
One of the nastiest looking offenders when covered in rust stains, is your toilet. Even after a good cleaning, it still looks gross. So, to get rid of these stains, you’re going to have to do a good cleaning. Before you start, turn off the water to the toilet and drain the water out by flushing the toilet. This way you have a dry space to work with while you scrub. Turn the bathroom fan on and/or open a window for some ventilation. These cleaning tips also work for the rust stains found in your sinks and bathtub, but don’t use your toilet brush on your bathtubs and sinks. You’ll want to use a ceramic-safe scrubbing pad that is made for bathtubs and toilets, and some include a handle for harder to reach places. Also, don’t use the same scrubbing pad for your toilet in your bathtub and sink to prevent the nasty transfer of germs. First you can try a mixture of one-part water and one-part vinegar. Spray this onto the toilet and scrub with a toilet brush or a ceramic-safe scrubbing pad. You can also mix one-part vinegar with three-parts baking soda to create a paste. Apply it to the toilet bowl by sprinkling it around the bowl. Then scrub the bowl with your toilet brush or ceramic-safe scrubbing pad. Turn the water valve back on and flush again to see the clean results. If you missed some areas, just repeat the process. Another more natural way of removing rust, is using lemon juice and salt. Mix bottled lemon juice and salt until it creates a thick paste. Apply the paste to the rust stains and let it sit for 15-20 minutes. When the time is up, scrub the paste and then rinse it off. The bonus to this type of cleaning, is having a lemony fresh scent. If these methods just aren’t cutting it and you need a little more fire power, there are products on the market that will remove rust stains that you can use as well. The downside is that they can be pretty harsh with their chemicals, so if you’re looking for a safer way to clean, go with the baking soda and vinegar. If you’d like to skip the reoccurring cleaning of rust, and eliminate the source of the problem, call Tony’s Plumbing to help find a solution for your bathroom.  Drip, drip, drip… The last thing someone wants to see is an unexpected leak, or something worse happening in their bathroom. You may start to immediately call your plumber, but stop and access if this is something you can take care of on your own. Let’s discuss some items you should have in your home in case an emergency like this happens to arise. Then you’ll have the tools to bandage before a plumber can arrive, or perhaps fix the problem on your own.
The first thing you’ll want to do when you discover a problem with a leak or drip is to turn off your main water supply. This will stop the problem while you access what is going wrong, and continue to do work on fixing the problem. Things you should have on hand to help with various issues are: A pipe wrench or tongue and groove pliers. Pipe wrenches are mainly used for steel or iron piping, while tongue and groove pliers that are also called slip-joint or channel-type pliers. They have a sliding adjustable size opening with longer handles. If you’re tightening the pipes to stop water from leaking out then you’ll need two, one to clamp and hold one pipe, while you are using the other one to twist and tighten the other. Plumber’s repair putty. You can apply this epoxy putty to help plug a leak up in a pinch. Per the instructions, knead the putty then apply to where the leak is emanating from, and it will harden in an hour. This will keep the leak contained until you can find a permanent repair solution. Electrical or Duct Tape and Hose Clamps. Just like the repair putty, these items can also be used in a pinch for a quick and temporary solution. If you have small pinhole leaks, you can wrap electrical or duct tape around the pipe several times. To keep it tight apply hose clamps to the ends of the tape. It will hold things at bay, until you can get a plumber to come out for your emergency. Assorted Washers. These items can help you with your dripping faucets, as they are an easy repair with just a replacement of the washer in the faucet. If you are clearing a clogged drain you may need to replace the slip washer after you have taken the drain apart. Figure out what sizes you will need for your different fixtures, so you can have several replacements on hand for emergencies. Plungers. When you hear plunger, we all immediately think of a toilet plunger. This is the item everyone probably already has on hand, but it doesn’t hurt to bring it up. Every bathroom needs an accessible plunger for when that horrible moment of the water slowly rising to the top of the toilet bowl as you dive for the water shut off valve at the back of the toilet to stop the terribleness from overflowing onto your bathroom floor. But you should also have a drain plunger for clog blocking a drain trap in your sink, shower, or tub. Drain Auger. When you find your drain is backed up and the usual methods of a drain plunger, and a baking soda/vinegar clearing is not doing the trick, then it’s time to employ the drain auger. Also, known as a drain snake, you can insert the metal cable into the drain and extend it through the drain with a rotating handle to break up or extract the clog. If you find yourself in an emergency situation and need repairs, give us a call today at Tony’s Plumbing and we’ll come to your rescue! 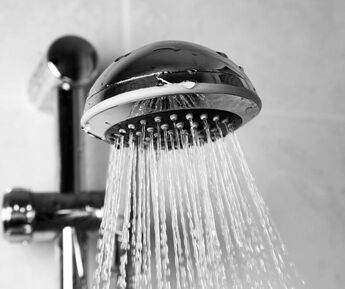 How often during the week do you start your day by showering? It’s the go-to cool down when stuck in the muggy Minnesota heat, or like 65% of Americans, could be the first thing you do when you wake up in the morning. Either way, showering is an essential part of living, and of the home. When is the last time you replaced your shower head? If you can’t remember that, try and think… When was the last time you cleaned it?
The shower head is one of the most underappreciated and overworked fixtures in the home! Most people don’t realize it, but your shower head can build up all kinds of nasty bacteria and leave you less clean than when you started. It is important to understand that where water lives, mold can grow. A typical shower head can experience build up due to hard water, sediments, and mold. So, how do you know when the right time to change your shower head is? The answer depends on a few different factors. Some shower heads last longer than others, for instance plastic shower heads will typically have shorter lifespans than a metal one, because metal is less likely to stimulate mold growth. The longevity of your shower head also depends on how hard the water in your home is, and if you have a water softener. Over time, no matter what shower head you decide on, you will likely notice a hard white calcium build up which will prevent water from passing through. This build up is due to the minerals and sediment in the city water and can be cleared out up to a point. A change in water pressure, leaks, funky smells or sediment build up are all signs that it’s time for a new fixture. Luckily for you, there are literally thousands of options out there. Shower heads come in many different shapes, sizes, and are broken down into specific categories based on what you’re looking to achieve with your showering experience. You can get ones that replicate the experience of being in the rain, or one that comes with a handheld to avoid moving around in a cramped shower space. There are other options such as a sliding bar for adjustable heights, ceiling over head installs, or multiple heads for additional coverage. The options are essentially endless. A new shower head is a simple decision in the long run, but can be agonizing in the moment. The fancier you’re aiming, the more expensive they get. It’s a good idea to try and match the other fixtures in your bathroom, because you don’t want a glaring difference every time you enter one of the most trafficked areas of your home. Once you know what kind of fixture you want, if you have any questions or need help with an install, you know you can rely on Tony’s Plumbing to take care of any of your plumbing needs.  Nobody wants to wake up in the morning, trudge to the shower only to stand in six inches of soap scummy water and claim to have cleaned up for the day. The drain in your bathtub or shower can slowly plug over time, or can feel like a weekly occurrence. What is important to know though, is that cleaning and maintaining your shower drain is often an easy fix, and saves you the plumbers bill. While there are occasionally clogs that won’t drain with even the most dedicated individual, it’s good to know when to reach for the toolbelt and when to reach for the phone.
The first important thing to grasp before you start planning your attack is to consider what the drain pipes from your shower or tub look like. A typical set up would include L-shaped drain pipes, and a P-trap. A P-trap is required in all sinks, toilets and drains, and serves to keep toxic sewer gas from leaking into your home. Most often, clogs in bathtubs are clumps of hair, debris and soap hardened and caught inside the piping. We recommend ignoring the flashy chemical cleaners that boast immediate results, and sticking for the tried and true method of a plumbers’ snake. A true plumbers’ drain auger is an expensive piece of equipment, but there are plenty of user friendly inexpensive options on the market that will clear out any hair or debris that have settled in the piping below. There are a variety of drain plugs, stoppers, strainers and overflow plates out there, so it is hard to say exactly which parts of your bathtub may need to be removed in order to gain complete access to a clog. In some tubs, you can simply open the drain, push the snake through the base drain in the tub, twist, remove and repeat. However, in other bathtubs you may need to remove the overflow plate, remove the stopper, and then use your snake to pull through any caught debris. Make sure you do some research before you start taking things apart, and if you decide to remove your overflow plate cover, pay mind to the screws and small hardware so that it doesn’t go down the drain and contribute to your clogged bathtub. Prevention is key! The best way to deal with clogs is to try and handle them before they happen. Just like the many options for plumbers’ snakes on the market, there are multiple options for drain covers that will help catch any hair or debris potentially threatening the drain quality of your shower. Some sit over the top, and some sit inside the drain. The type of drain cover you choose will depend on the type of drain plug inside your bathtub. If you know how to remove the strainer, the stopper or the overflow drain to gain access to the clog, you save yourself the money of hiring someone to come out and fix the problem for you. If you are facing a clogged bathtub beyond your abilities and need the eyes of the best plumbers in the Twin Cities, give us a call. |
AuthorAt Tony's Plumbing & Heating, we offer outstanding residential and commercial plumbing and heating services in the East Twin Cities metro. With our blog, we hope to bring you useful tips and tricks for ever day life! Archives
June 2024
Categories
All
|
 RSS Feed