 As homeowners, there can be lots of things to learn. There’s the life expectancy of the roof, the HVAC, appliances, etc, etc… The list goes on and on. But have you thought about your plumbing? We all know how important this aspect of your home is. If you’ve ever had to turn off your water, then you realize immediately how often you are utilizing it. So let’s talk about how long different facets of your plumbing should last.
First, let’s start with your water heater. Depending on the type of water heater you have, the life span will vary. A traditional water heater will last about 8-12 years (depending on the manufacturer’s suggested service life). While a tankless water heater should get you around 20 years of operable use. These are the typical lifespans for these units, though there are variables to this particular item, like how many people in your house are using the hot water everyday. Your water heater should have a sticker on the side of it stating the year it was installed, if not, then it should be included on your water heater manual. Your pipes might be the most important thing to know the status of. If they are compromised, then there is a potential for a broken pipe in your house that can cause all sorts of expensive water damage. So it’s best to know that they are in solid shape. If you don’t already know, check your home inspection report or home warranties as to when your plumbing was installed and what type of pipes are in your home. Metal pipes like steel, iron, and brass will generally last you about 50-70 years, while copper will last a little longer at 70-80 years. Plastic PVC piping doesn’t last as long, with a lifespan of less than 50 years. Consider hiring a plumber to inspect the current state of your pipes if you are unsure about their status. Moving onto the lifespan of your faucets. These typically will last you about 12 years, but might need some additional maintenance to make it that far. If there is a hard water build up, they may need a cartridge replacement. If there is leaking, you can try taking it apart and reassembling it. But this might require a replacement if tightening the parts doesn’t do the trick. If you find rust coming out of the faucet, then it’s definitely time to get a new faucet. For those of us with sump pumps or well pumps, that’s another plumbing aspect to be aware of. Sump pumps help keep basements dry and usually last about 10 years, so remember to keep this one on your calendar and have it inspected when you are approaching 10 years to make sure it’s still properly running to avoid potential basement damage. And for those of us with well pumps, the lifespan is about 8-15 years. Depending on how many people are in the house, water usage, and how much sediment can build up, all can determine how long the well pump will last. This is also an important one to be aware of, since it is what provides water into your house. And last, but not least, your toilet. These will last a long time, up to 50 years. But the components in your tank might not last quite as long. These can be easy fixes, and you’ll know when these parts need replaced, because you’ll have trouble with flushing the toilet. If you have an older toilet, that is not energy efficient, consider having that replaced to get a smaller water tank. This can help save on your water usage and your billing.
1 Comment
 If you’re a homeowner, at some point, you’re going to have to replace your water heater. Since the lifespan of a water heater is between 8-15 years, you’ll have to replace yours someday. And when that day comes, there are a few different types of water heaters that you can choose from: gas, electric or tankless. Here are the basics on the advantages, disadvantages and their differences.
Gas Water Heater Though these types of water heaters cost more than electric upfront, they will cost less to operate due to the cost of natural gas. Look for a model that doesn’t use a continuously burning pilot light for the most cost efficient heater. Another perk with having a natural gas line to your heater, makes it more reliable. In the event of a power outage, you’ll still have access to hot water, unlike an electric water heater that needs electricity to operate. When a water tank runs out of hot water, a gas heater heats up a fresh tank of water faster than an electric heater. Electric Water Heater These are a less costly option for purchasing, but there will be higher monthly costs with the service for electric rather than natural gas. Electric water heaters are safer than gas water heaters because with the lack of an open flame underneath a gas unit, there is less risk of fire. An electric water heater will also be easier to use and be smaller in size than a gas heater. Electric water heaters do have a slower recovery rate. If you use up all your hot water in the tank, it’s going to take a lot longer to heat up the fresh water into the tank. Think about your family and household needs, if you use lots of hot water at the same times of day, then maybe gas is a better option. As far as maintenance goes, both gas and electric are fairly easy to maintain. To help lengthen the tank’s lifespan, both types should be flushed regularly to stop sediment from building up on the bottom of the tank. Though, with a gas heater, the lines should be inspected periodically to prevent gas leaks. Tankless Water Heater Upgrading to a tankless water heater is a value to any home. These units will last longer, offer endless hot water, and use less energy that can reduce utility bills. Without the need for a giant tank of water, tankless water heaters take up less space than other water heaters, opening up more room in your utility space. These units look neater than a hot water tank, so this could be a benefit if your hot water heater is visible in a high traffic area. On-demand heaters provide a continuous supply of hot water as it’s needed, eliminating the need to keep up to 60 gallons of water hot all the time. Tankless water heaters that operate with natural gas are more efficient than tankless electric heaters because they can provide more gallons per minute of hot water. If you’re going tankless, gas is better than electric. The disadvantage of a tankless is that it is more expensive than regular gas or electric water heaters. Tankless water heaters also require much less maintenance. Depending on the quality of your water supply it will need maintenance every 4-5 years. 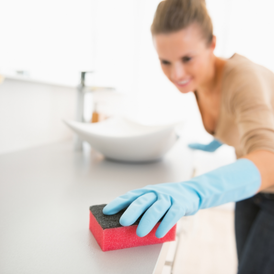 Cleaning bathroom. Photo courtesy of canva. Cleaning bathroom. Photo courtesy of canva. If you have unsightly stains on your bathtub, sink, or toilets, it could be rust. These rust stains can be caused by a number of things, but it’s more often that your galvanized pipes have accumulated rust that is caused by hard water leaving residue of iron and minerals behind. Here’s some easy ways to clean them up for a like-new sparkling bathroom.
One of the nastiest looking offenders when covered in rust stains, is your toilet. Even after a good cleaning, it still looks gross. So, to get rid of these stains, you’re going to have to do a good cleaning. Before you start, turn off the water to the toilet and drain the water out by flushing the toilet. This way you have a dry space to work with while you scrub. Turn the bathroom fan on and/or open a window for some ventilation. These cleaning tips also work for the rust stains found in your sinks and bathtub, but don’t use your toilet brush on your bathtubs and sinks. You’ll want to use a ceramic-safe scrubbing pad that is made for bathtubs and toilets, and some include a handle for harder to reach places. Also, don’t use the same scrubbing pad for your toilet in your bathtub and sink to prevent the nasty transfer of germs. First you can try a mixture of one-part water and one-part vinegar. Spray this onto the toilet and scrub with a toilet brush or a ceramic-safe scrubbing pad. You can also mix one-part vinegar with three-parts baking soda to create a paste. Apply it to the toilet bowl by sprinkling it around the bowl. Then scrub the bowl with your toilet brush or ceramic-safe scrubbing pad. Turn the water valve back on and flush again to see the clean results. If you missed some areas, just repeat the process. Another more natural way of removing rust, is using lemon juice and salt. Mix bottled lemon juice and salt until it creates a thick paste. Apply the paste to the rust stains and let it sit for 15-20 minutes. When the time is up, scrub the paste and then rinse it off. The bonus to this type of cleaning, is having a lemony fresh scent. If these methods just aren’t cutting it and you need a little more fire power, there are products on the market that will remove rust stains that you can use as well. The downside is that they can be pretty harsh with their chemicals, so if you’re looking for a safer way to clean, go with the baking soda and vinegar. If you’d like to skip the reoccurring cleaning of rust, and eliminate the source of the problem, call Tony’s Plumbing to help find a solution for your bathroom.  Drip, drip, drip… The last thing someone wants to see is an unexpected leak, or something worse happening in their bathroom. You may start to immediately call your plumber, but stop and access if this is something you can take care of on your own. Let’s discuss some items you should have in your home in case an emergency like this happens to arise. Then you’ll have the tools to bandage before a plumber can arrive, or perhaps fix the problem on your own.
The first thing you’ll want to do when you discover a problem with a leak or drip is to turn off your main water supply. This will stop the problem while you access what is going wrong, and continue to do work on fixing the problem. Things you should have on hand to help with various issues are: A pipe wrench or tongue and groove pliers. Pipe wrenches are mainly used for steel or iron piping, while tongue and groove pliers that are also called slip-joint or channel-type pliers. They have a sliding adjustable size opening with longer handles. If you’re tightening the pipes to stop water from leaking out then you’ll need two, one to clamp and hold one pipe, while you are using the other one to twist and tighten the other. Plumber’s repair putty. You can apply this epoxy putty to help plug a leak up in a pinch. Per the instructions, knead the putty then apply to where the leak is emanating from, and it will harden in an hour. This will keep the leak contained until you can find a permanent repair solution. Electrical or Duct Tape and Hose Clamps. Just like the repair putty, these items can also be used in a pinch for a quick and temporary solution. If you have small pinhole leaks, you can wrap electrical or duct tape around the pipe several times. To keep it tight apply hose clamps to the ends of the tape. It will hold things at bay, until you can get a plumber to come out for your emergency. Assorted Washers. These items can help you with your dripping faucets, as they are an easy repair with just a replacement of the washer in the faucet. If you are clearing a clogged drain you may need to replace the slip washer after you have taken the drain apart. Figure out what sizes you will need for your different fixtures, so you can have several replacements on hand for emergencies. Plungers. When you hear plunger, we all immediately think of a toilet plunger. This is the item everyone probably already has on hand, but it doesn’t hurt to bring it up. Every bathroom needs an accessible plunger for when that horrible moment of the water slowly rising to the top of the toilet bowl as you dive for the water shut off valve at the back of the toilet to stop the terribleness from overflowing onto your bathroom floor. But you should also have a drain plunger for clog blocking a drain trap in your sink, shower, or tub. Drain Auger. When you find your drain is backed up and the usual methods of a drain plunger, and a baking soda/vinegar clearing is not doing the trick, then it’s time to employ the drain auger. Also, known as a drain snake, you can insert the metal cable into the drain and extend it through the drain with a rotating handle to break up or extract the clog. If you find yourself in an emergency situation and need repairs, give us a call today at Tony’s Plumbing and we’ll come to your rescue!  If you are a new homeowner or renter, then you should figure out where your shut-off valves are located in your home. Even if you have lived in your home for a while, if you don’t know where they are, you should. A shut off valve will stop water from entering into your home, so all your plumbing fixtures can’t run water while it is closed. So it’s best to know where it is in case of emergencies, like trouble with leaking or broken pipes. Especially when winter weather hits, any exposed pipes are open to cracking and freezing. And if that terrible fate of burst pipes falls upon you, then you are in for a big mess of water everywhere. So if you find yourself in that horrible situation, you’ll need to know where your main shut-off valve is located so you can turn the water off quickly! It’s also good to know where the main shut-off is located if you need to do work on any of your plumbing.
To locate your home's main water shut-off valve, you’ll want to look on the perimeter of the inside of the house, since that is where the water will first enter your home. Search for the valve on your lower level, they are typically found in a basement, if your home has one. If you don’t have a basement, try looking inside a crawl space (again, if you have one). The valve is usually located within three to five feet of where the water main enters the home. It should enter your home from the side facing the street. If you can’t find it on that wall, then you’ll want to check near the furnace and water heater, or in a mechanical room. It could also be hidden in a closet on the perimeter wall, so don’t forget to check those. The main valve is the one located next to the water meter. Once you’ve located it, you should know how it works. If you have a handle on your valve, and it is parallel to the pipe then the valve is open. And if the handle is perpendicular to the pipe, then the valve is closed. Or if there is a handwheel on the valve, then the old “righty tighty, lefty loosey” adage works. Just turn the handwheel left to open and then right for the closed position. If you happen to find yourself in the unfortunate situation of burst pipes or any other cause that has you running for the main shut-off valve, give us a call today at Tony’s Plumbing and we’ll help you get it all fixed up so you won’t have to think about your shut-off valve again.  Who doesn’t want to have a beautifully landscaped yard for their home? Lovely flowers and grand trees really bring out the curb appeal of our homes. But we have to be careful of some of the bad side effects that can come with our quest for shade. We’re talking about those pesky tree roots that can cause damage to your sewer pipes.
Thirsty tree roots naturally grow toward any leaks in your water and sewer pipes, as they provide not only water, but nutrients and oxygen plants crave. And once tree roots find a leak, they can creep into your pipes. This can cause water flow blockage or pipe damage that can lead to costly repair bills. So how do we prevent this catastrophe? If you are planning on planting trees, think about where you are going to plant them. First call your local public works department or the “Call before you Dig” number, and they can give you the location of your underground utilities. It's always a good idea to know where cables, lines, and pipes are buried before doing any landscaping or planting. Then plan out where your trees and plants will go. Limit the amount that you place close to the sewer lines and plant larger trees farther away so the tree roots cannot reach the pipes. If you want to plant closer to the sewer pipes for aesthetic purposes, then consider trees that are slow growing with small root balls. Create a barrier between your sewer lines and tree roots. You can choose a few different options to create a barrier to help deter tree roots from getting into your sewer lines, like spreading slow release chemicals of potassium hydroxide or copper sulfate. Or you can bury metal or wood barriers 6 to 12 inches deeper than the pipe, running them vertical next to sewer lines. If you already have trees in the vicinity of your sewer pipes, you can avoid major sewer repairs by cleaning sewer lines regularly. You can buy a root killer or flush a cup of rock salt down your toilet. Regular maintenance can prevent root growth inside the pipes. A few warning signs that roots are invading the pipes are frequent clogged drains or slow drainage. Sometimes there can be gurgling noises from your toilet. If this is occurring, call a plumber to come inspect your sewer and drain pipes. They can run a camera through your pipes to see if tree roots are the culprit, leading to possible drain line replacement. So if you are designing a new landscaped lawn, think about doing a thoughtfully planned out design so you can avoid the chance of dealing with a potential costly problem down the road.  Uh oh… You’ve opened your dishwasher to discover there’s standing water just sitting in the bottom. Before you panic and call a plumber, try these steps to fix it yourself.
The simplest thing to do first, is run the dishwasher again. The dishwasher may have inadvertently shut off during its last cycle and that’s why there is undrained water. So give it another go, and if the bottom is still filled with water, then try these next steps. Turn on your garbage disposal. Sometimes it’s that easy. Running the garbage disposal will clear up any food or sludge that may be blocking the drain pipe. Since the drain hose from the dishwasher empties into the garbage disposal drain, this step can easily clear up this issue. Still didn’t drain? It’s time to remove the standing water to find the culprit. Remove the bottom dish tray by sliding it out and lifting it off the dishwasher door. Use a cup to scoop the dirty water into a bucket. When you are unable to scoop the remaining water, use towels to dry up the last of it. Now that the water is removed, you can clean your drain basket. You can find it at the bottom of your dishwasher’s interior, it looks like an upside-down basket. If it doesn’t look like a basket, then consult your dishwasher manual. Remove the cover to check for buildup in the basket beneath. Remove the food gunk, replace the cover, then run the dishwashing cycle again. Pre-rinse your dishes before you load them into the dishwasher to keep your drain basket from getting clogged. Check the drain hose for kinks or clogs. The drain hose is the plastic hose that connects the dishwasher’s drain pump to the garbage disposal or to an air cap. Something may have been shoved under the sink that is now impeding the hose. If you see that the hose has been bent, try straightening it out using your hands. If it won’t quite straighten out properly, then you may need to replace the drain hose. If your investigation of the drain hose reveals it isn’t kinked, then check for a clog. To do this, unplug the dishwasher, then remove the lower front panel to find where the hose attaches to the drain pump. The front panel may require you to remove some screws, but it should just pop off. Check the dishwasher’s manual if you need assistance on how to remove the panel. Then disconnect the hose from the pump, and blow through the hose. If air won’t flow through it, then it’s clogged. Try using a thin tool to get the gunk out of the ends of the hose, you can try a straightened out coat hanger to go deeper into the hose. If it’s unreachable, you’ll probably have to replace the hose. If you need to replace the hose, you can try and tackle the job yourself by removing the entire dishwasher unit to de-attach the hose and replace it. Consult your manual for the correct hose to purchase. If you’d like to save yourself the hassle, then it’s time to call a plumber. They will do the complicated dirty work for you. Call Tony’s Plumbing today for your dishwasher needs!  If your home happens to have a sump pump, then you know that they can tend to get stinky from time to time. Here are some ways to clean it and get that funky smell out of your basement!
Determining where the smell is coming from is the first step. A garbage-like smell coming from your sump pit means that there is probably a build up in your pipes that needs to be cleaned. If it smells more like rotten eggs, then it is usually because your pit has dried out and sulfur dioxide smells are coming up from the sewer. To clean your sump pump, first turn the water off for fixtures that lead into your sump pump, like your washing machine. Disconnect your power to the sump pump, usually by just unplugging it or turning that circuit breaker off. Carefully remove your sump pump using a garbage bag or plastic sheeting, so as not to drip any sludge or water on your floor as you carry it outside for cleaning. Use your garden hose to rinse off the first layer of sludge, then use a scraping tool to clean off any caked on grime. Then rinse it again with the garden hose. You can then drain the check valve in the sump pit. Place a bucket underneath the valve, and open it and let any existing water drain into a bucket. If there is any water left in the sump pit, vacuum it up with a shop vac. To clean your sump pit, mix one cup of bleach into a gallon of water and pour it down into the sump pit. Make sure the drains and pipes within the pit are covered with water. Add a little more if necessary to bring water back up to the proper level. Be careful if you try using vinegar to clean your sump pump, as if not done properly, it can damage your sump pump. After you are all finished cleaning, reconnect your pump to the discharge pipe and check the valve. Turn the water back on and plug in your pump or turn your breaker back on, and you’re good to go. As for frequency of cleaning your sump pump, typically you should think about cleaning it once a year for removal of the sump pump to clean both the pump and the pit. If your sump pump doesn’t dispose of washing machine water, the pump screen or inlet opening should be cleaned every three to four months. If you find you might need more service after cleaning the system, call us for additional help!  Sometimes our homes are not designed or decorated exactly as we’d like them to be. Things can sometimes be put in an area of the home that, for one reason or another, is in plain view. This can be quite deterring for those who may want to make a beautiful space for their family.
So what do you do with an aesthetically out-of-place water heater? One option is to replace it with a tankless water heater that takes up a lot less space, and can be slightly more attractive. And if you want to go one further, you can find some tankless water heater pipe covers on the market to help hide those unsightly pipes. But if you’d like a little less costly solution, there are lots of DIY options to consider. Things like building cabinets or closets with new or recycled materials of old shutters or scrap wood, hanging curtains from curved track or curtain rods, or setting up a basic room divider. If you want to try your hand at this DIY divider made out of old shutter doors, check out this tutorial on how to make it: https://oldhighwaycottage.com/solution-hiding-ugly-water-heater/ You can also consider making your design less of a feature to the room, by concealing the covering of your choice. You can paint the covering the same color of the rest of the room, blending it into the room. There are some tutorials online on how to construct electric water heater covers like this one that makes it feel like part of the constructed room: https://www.woodshopdiaries.com/hide-ugly-water-heater/ There are some things to consider when choosing a covering. Make sure that there is room around the tank, and that there is an easy way to access it. You don’t want to wall it up with drywall or seal it in another way. Water heaters need to be accessible if an issue happens to arise, like water leakage, if the pilot light goes out, or other general maintenance issues. If you have to call a plumber for an issue, you want to make sure they can get to your water heater and have space to do their work. Also, consider when placing these things around a gas water heater to be cautious of proximity and the materials you use, as it can be a fire hazard. First and foremost, you want to have a safe home! Now get to it. It can be satisfying to create a more beautiful space, no matter what style you choose to conceal your water heater.  There’s always a distinct feeling of dread when you notice a chip or crack in the porcelain at home. Commercial epoxy fillers, chip repair kits and refinishing products are available for easy and simple repairs to small dings and damage. These products are handy ways to keep the costs down as long as there are only minor issues. But, how do you know when it’s time to replace the toilet, or simply repair it?
Toilets last a long time, and especially when cared for properly, you can’t look at a toilet and know how old it is. So, if you’ve started to have issues with your toilet there are a few signs to look out for that will show you whether you should replace or repair it. The first thing to contemplate when considering replacing a toilet, is the actual number of issues. Write them out, and then think about the time you’ll need to invest in the toilet to repair it. If there are a couple of chips and the toilet set needs to be replaced, that’s one thing. But if there is a crack, the flip valve is busted and it’s leaking...maybe it’s time to consider giving Tony’s a call. Does your toilet shift when you sit on it? This is a clear sign the toilet needs to be replaced. Toilets should never shift if sat on, it could be a sign that the toilet is improperly sealed. You can attempt to tighten the bolts on either side of the toilet, but if this does not fix the issue contact a plumber immediately. If your water consumption is incredibly high, your toilet could be the cause. If you’ve noticed that your water use is high at home, it could be beneficial to invest in a low-flush toilet. Low-flush toilets use an average of 2 gallons per flush, while typical toilets can use somewhere between 3-5 gallons. Frequent clogs are also a sign that your toilet is getting on in age, which can be common in older or low-flush toilets. If you have to plunge the toilet weekly or more, it could mean that it’s no longer working efficiently. Being a homeowner comes with a laundry list of responsibilities. You need to think about things like energy efficiency, when the bathroom was last caulked and whether that eerie thud in the pipes is a problem worth fixing. Minor damages are bound to happen in any well lived space due to typical wear and tear, but sometimes minor damage crosses over to major fairly quickly, and almost always when we are least expecting it. Not everything requires a professional to replace, however, this laundry list can become expensive fast. If you’ve got questions about an ill functioning toilet not answered in this list, call us, your favorite local Minnesota plumbers Tony’s! |
AuthorAt Tony's Plumbing & Heating, we offer outstanding residential and commercial plumbing and heating services in the East Twin Cities metro. With our blog, we hope to bring you useful tips and tricks for ever day life! Archives
January 2024
Categories
All
|
 RSS Feed