 Have you ever looked around your home and wondered about the quality of your plumbing? Plumbing is an important and intricate part of any building design, and can be incredibly frustrating when problems arise. The various types of pipes all exist for different reasons, and come with their own list of pros and cons. There are loads of rules and regulations that stand in the way of shabby jobs and can prevent costly mistakes, but old homes often come with old plumbing. So, how does one know what kind of pipe is the best for plumbing?
For more than a century, copper pipes were used for indoor plumbing, and were the best option available. These natural pipes create a biostatic atmosphere which limits the growth of bacteria, but they are expensive and require extensive labor to install. In cold weather climates, these pipes freeze and in worse cases burst. The durable quality is a benefit but these pipes do still corrode with certain pH levels, making them unappealing in our Minnesota weather. ABS, or acrylonitrile butadiene styrene, pipe was developed in the 1950’s in Arizona. These pipes were created for use in the chemical industry, and oil fields. ABS pipes were discovered to be easier to work with and cheaper than their metal alternatives such as copper, cast iron and galvanized steel. There is one crucial difference between ABS and PVC pipes, though, and that is how they are formulated. ABS pipes contain BPA to harden them, making these pipes poor candidates for most plumbing projects. Polyvinyl chloride, or PVC pipes were generated using copolymer clay and date back to 1912 Germany, though due to poor quality and lack of success with production, they were not used as plumbing until 1936. In the years following, there was a gradual uptick in the properties built and plumbing replaced using the PVC pipes, as they were found to be more durable and suitable for waste relocation. PVC pipes were used in much of Germany and Japan’s rebuilds after WWII, where they became a building standard and are still used today. PVC was the standard for a long time, but was shown up by PEX pipes in the 1980’s. PEX is a polyurethane pipe with cross-links. It is cost effective, flexible and doesn’t require the use of joints which can promote weak spots in the plumbing. PEX pipes are seen in most new homes being built today, and are an easy industry standard. It’s important to do your research before starting any big project, and to always check the local building codes. These regulate the types of piping you can use in your home projects so your decision may have been made for you. If you’re looking around considering if your plumbing is the next big upgrade at home, you could be right! That being said, we don’t recommend you taking on that project, or even that consideration, alone. If you’ve had a long and tiresome history with your pipes, either freezing, creaking or leaking, we are here for all your plumbing questions.
5 Comments
 Few people do this, but have you ever read the instructions on your cleaning products? If you’re using disinfectants, they need to sit on the dirty surface and soak to be effective. This means any time you have sprayed and swiped; you’ve actually just pushed the germs around! Cleaning high trafficked areas has never been more important than it is in today’s world. The busiest place in any given household? The bathroom.
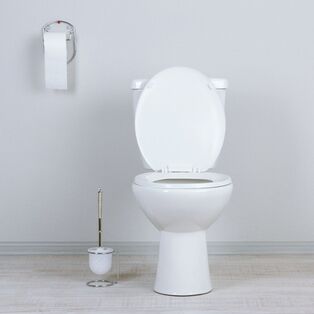
Cleaning your bathroom is an important part of a healthy home. The toilet is something every person in your home will touch at one point or another, so it needs to be cleaned regularly, and properly. Using a strong disinfectant will ensure you are getting rid of any bacteria that might be hanging around. You need to make sure that your toilet is clear and free of any debris before you spray any disinfectants on and allow them to then soak. Lysol cleaning spray instructions state they need to soak for ten minutes to be effective! You need some important items to clean a toilet properly:
The first step to thoroughly cleaning a toilet is going to be clearing away any items surrounding the toilet. Remove all rugs and items that may be sitting behind it and clean them, as flushing the toilet will cause bacteria to spray outside of the bowl. It is unsanitary to keep items too close to the toilet. In small and large bathrooms alike, it is always a good idea to flush the toilet with the seat down, and make sure you clean any items that are spending time in the area. After removing extra items surrounding the toilet, use a rag or paper towels to do a cursory wipe down and remove any dust around the toilet. Spray the toilet, and surrounding area with your disinfectant and turn your attention elsewhere while your product does its job. Lift the toilet seat and pour in your cleaning solution allowing it time to soak as well. Once you have allowed the product to fully saturate the toilet, use the bristled brush to scrub the inside of the toilet. It is important to make sure you scrub under the rim inside the toilet bowl, as debris can build up keeping your toilet filthy no matter how clean the rest of it becomes. Sponges, old toothbrushes, and bristled brushes are great tools for getting into the cracks and grooves of any tile grout or crevices near the toilet. After you’ve scrubbed every inch, wipe the toilet down with a wet towel or some paper towels. Cleaning the bathroom is not a glamorous chore, no matter how you spin it. We all know how nice it is to have a thoroughly cleaned bathroom. This is one of the most used places in the home, so it is important to clean all areas that are frequently touched. The toilet is a place everyone uses, and if you live in a home with multiple people it’s important to keep up on how often you clean both that toilet and bowl. 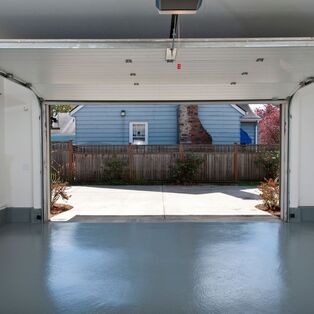 It’s fairly typical to sit and daydream about what your space could be, right? If you could repaint this, or afford the fancy copper vanity with matching tile work in the bathroom, things would feel perfect at home. Most winters, we find people daydreaming of warm days on sunny beaches, so we like to suggest to all our Minnesota inhabitants; radiant flooring should be your next daydream. It’s not the same as dipping your toes in the sand, but it does sweeten the brutal weather we experience for six months out of the year ever so slightly.
Radiant heating is great for any room in the house that needs to be evenly heated. One of the best perks of in floor heating is one won’t experience cold spots like with a traditional ventilated heating method. While Minnesota weather doesn’t allow anyone to rely solely on radiant heating, it does supplement the heating vents, and actually requires less work out of the furnace to stay warm. Since heat would rise up from the floors, the room will feel warmer but be able to be kept at a cooler temperature. Like with most things, there are pros and cons. The list of pros for radiant heating seems, at least in our minds at Tony’s, to greatly outweigh the cons. The three biggest cons to radiant flooring are really to be expected:
The best space in the home to have radiant heating these days, in our opinions, is the garage. Obviously the bathroom is pretty high up on the list too. No one likes stepping out of the shower and getting covered in goose pimples from the chilly tile on the floor, but a heated garage floor is a coveted garage floor. Installing radiant heating in the garage extends the space in the home, turning the garage from just a place to store a vehicle to a place for hobbies and to function during the coldest months of the year. At Tony’s, we can install radiant heated flooring anywhere in the home, even sidewalks! What room in your home is the setting of your next daydream? 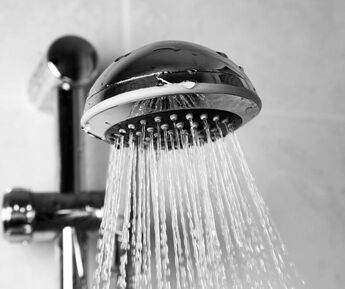 How often during the week do you start your day by showering? It’s the go-to cool down when stuck in the muggy Minnesota heat, or like 65% of Americans, could be the first thing you do when you wake up in the morning. Either way, showering is an essential part of living, and of the home. When is the last time you replaced your shower head? If you can’t remember that, try and think… When was the last time you cleaned it?
The shower head is one of the most underappreciated and overworked fixtures in the home! Most people don’t realize it, but your shower head can build up all kinds of nasty bacteria and leave you less clean than when you started. It is important to understand that where water lives, mold can grow. A typical shower head can experience build up due to hard water, sediments, and mold. So, how do you know when the right time to change your shower head is? The answer depends on a few different factors. Some shower heads last longer than others, for instance plastic shower heads will typically have shorter lifespans than a metal one, because metal is less likely to stimulate mold growth. The longevity of your shower head also depends on how hard the water in your home is, and if you have a water softener. Over time, no matter what shower head you decide on, you will likely notice a hard white calcium build up which will prevent water from passing through. This build up is due to the minerals and sediment in the city water and can be cleared out up to a point. A change in water pressure, leaks, funky smells or sediment build up are all signs that it’s time for a new fixture. Luckily for you, there are literally thousands of options out there. Shower heads come in many different shapes, sizes, and are broken down into specific categories based on what you’re looking to achieve with your showering experience. You can get ones that replicate the experience of being in the rain, or one that comes with a handheld to avoid moving around in a cramped shower space. There are other options such as a sliding bar for adjustable heights, ceiling over head installs, or multiple heads for additional coverage. The options are essentially endless. A new shower head is a simple decision in the long run, but can be agonizing in the moment. The fancier you’re aiming, the more expensive they get. It’s a good idea to try and match the other fixtures in your bathroom, because you don’t want a glaring difference every time you enter one of the most trafficked areas of your home. Once you know what kind of fixture you want, if you have any questions or need help with an install, you know you can rely on Tony’s Plumbing to take care of any of your plumbing needs. 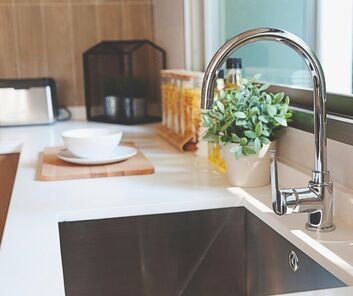 One of the worst misnomers in the plumbing world is the concept of the garbage disposal. The name would suggest that you can dispose of garbage in the sink, but that couldn’t be farther from the truth. A garbage disposal allows you to avoid a stinky rotting waste bin, and eliminates some of the worry about food waste washing down your drain. Garbage obviously doesn’t belong down the disposal, but neither do a lot of other items! Most garbage disposals are finicky machines that will go on strike at a moment's notice if you try to feed them something they don’t like.
There are numerous food waste items that seem like they wouldn’t be an issue to put down the drain, but actually do a lot of damage if done too often. Another thing to consider before putting something down the garbage disposal is beyond the machine itself. It’s important to think about what you are sending down the drain into your pipes and plumbing. The better you treat your garbage disposal, the fewer times you’ll have to call Tony’s in for repairs! We’ll say it again for anybody who needs to hear this; do not put coffee grounds, egg shells, or bones down your disposal! Most people are aware of these big issue items, but it’s always good to refresh your memory. All three of these items are solid examples of the mushy clog, fibrous build up, or just too tough on the machinery reasons you should think before you grind! As a general rule, starchy scraps and mushy items are going to wreak havoc on your system, no matter what they are. You’ve likely put small vegetable or fruit scraps in your disposal, sure. But if you put potato skins in the disposal, you’ll end up with a soupy mess and a nasty clog. The same goes for items like banana peel, onion skins, and other fibrous vegetables. Oatmeal, nuts, rice or pasta belong nowhere near the disposal either. For similar reasons to above, they break down and cling to each other, binding the gears and coating the drain pipes. These items along with fruit pits and any kind of shell, oyster or otherwise, should be tossed in the trash where they can be disposed of without damaging your kitchen. You should also avoid putting oil, grease or cooking fats down the drain. Anything that coagulates as it gets cold shouldn’t go down the drain, because it will cause a clog. Even things like paint aren’t a good idea, as it can coat the walls of the pipes to create a slow clog over time. Biodegradable items can go down the drain safely, and aren’t something to worry about. Your disposal can handle small amounts of food waste, but it’s a great idea to throw out what is waste, or try a compost if that option is available to you. Garbage disposals are a great and helpful part of the kitchen, but they do their best work when you pay mind to what you give them. As your favorite local Oakdale plumber, we are always around to help if you have an issue or even just a question! Give Tony’s a call today! 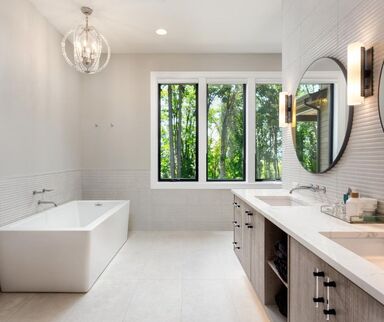 Nobody wants to wake up in the morning, trudge to the shower only to stand in six inches of soap scummy water and claim to have cleaned up for the day. The drain in your bathtub or shower can slowly plug over time, or can feel like a weekly occurrence. What is important to know though, is that cleaning and maintaining your shower drain is often an easy fix, and saves you the plumbers bill. While there are occasionally clogs that won’t drain with even the most dedicated individual, it’s good to know when to reach for the toolbelt and when to reach for the phone.
The first important thing to grasp before you start planning your attack is to consider what the drain pipes from your shower or tub look like. A typical set up would include L-shaped drain pipes, and a P-trap. A P-trap is required in all sinks, toilets and drains, and serves to keep toxic sewer gas from leaking into your home. Most often, clogs in bathtubs are clumps of hair, debris and soap hardened and caught inside the piping. We recommend ignoring the flashy chemical cleaners that boast immediate results, and sticking for the tried and true method of a plumbers’ snake. A true plumbers’ drain auger is an expensive piece of equipment, but there are plenty of user friendly inexpensive options on the market that will clear out any hair or debris that have settled in the piping below. There are a variety of drain plugs, stoppers, strainers and overflow plates out there, so it is hard to say exactly which parts of your bathtub may need to be removed in order to gain complete access to a clog. In some tubs, you can simply open the drain, push the snake through the base drain in the tub, twist, remove and repeat. However, in other bathtubs you may need to remove the overflow plate, remove the stopper, and then use your snake to pull through any caught debris. Make sure you do some research before you start taking things apart, and if you decide to remove your overflow plate cover, pay mind to the screws and small hardware so that it doesn’t go down the drain and contribute to your clogged bathtub. Prevention is key! The best way to deal with clogs is to try and handle them before they happen. Just like the many options for plumbers’ snakes on the market, there are multiple options for drain covers that will help catch any hair or debris potentially threatening the drain quality of your shower. Some sit over the top, and some sit inside the drain. The type of drain cover you choose will depend on the type of drain plug inside your bathtub. If you know how to remove the strainer, the stopper or the overflow drain to gain access to the clog, you save yourself the money of hiring someone to come out and fix the problem for you. If you are facing a clogged bathtub beyond your abilities and need the eyes of the best plumbers in the Twin Cities, give us a call.  When you own a home, the laundry list of items to attend to is often daunting. There is always a chore to be done, whether it’s siding the house, weeding the yard, or staining your deck. You can always find yourself in a project if you hang around your home long enough. It seems that one important item is missed when reviewing the chore list. When was the last time you inspected your home for water damage?
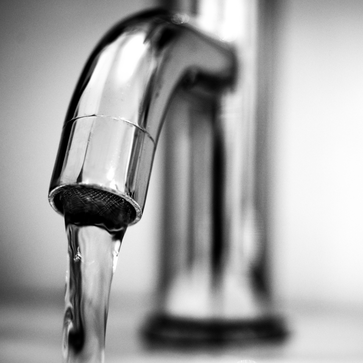
Your water damage inspection should start outside your house. Afterall it takes some of the most damage due to weather and the change of seasons, it only makes sense to make sure there are no chinks in your home's armor. Look over the outside of the house near any entrance points. This includes a thorough inspection of your window frames, roofing and gutters. Any damaged points should be repaired as soon as possible, and potentially tested for moisture if they were exposed to water for any period of time. Another area to inspect outside the home is your yard. A properly flowing yard will allow natural runoff away from your house. If you have a yard that puddles, or holds lots of moisture close to the home, consider landscaping your yard to repair the area and avoid damaging your home. It’s also a great idea to repair any and all cement in your yard, such as walkways or driveways to avoid water erosion. The next spaces you should thoroughly look over are any basements, crawl spaces or attics. If you do not make a habit of going into these areas, it’s a great time to check it out for any stagnant water. Attics are vulnerable to leaks due to the joining points of your roof, especially in winter. Where the attic seams together, or anywhere near a chimney could present an easy access point for moisture. These areas are notorious for ice dams. It’s important to make sure that your home survived the winter unscathed, and will get through a humid summer too. Interior water damage is perhaps the easiest to spot. Cracks in the drywall, bubbling paint or soft walls are all signs of water damage. If you’re noticing any of these, especially paired with discoloration, it’s a sign of a water leak and needs professional attention right away. Water damage isn’t trivial, it can present real health issues and expensive repairs. Some water damage is covered by homeowners insurance, but it’s important to try and maintain your home and avoid filing costly claims when possible. We encourage our customers to take a hands on approach to their homes. If you suspect there is an issue, investigate it. Water damage can appear anywhere in your home, so knowing the signs is an important part of being an effective home owner. It saves you money and time in the long run. In that same token, we also understand that time is not always on our side! We are always around to do thorough inspections and ensure you won’t have mold growing right under your nose.  The plumbing of your home is a valuable and important part of daily life. The average home in Minnesota uses 94 gallons of water a day, and leaks make up a surprising 10% of that total. It’s important to conserve resources and small leaks are just one of the plumbing mistakes that can cost you over time. We understand that as a homeowner, you like to take things into your own hands. Unfortunately, mistakes are easy to make, so here’s a bit of advice for any projects you may attempt.
The first bit of advice we’d like to share here is knowing the extent of your abilities. If you have ideas or hopes for the future plumbing of your home, do some thorough research of what this project entails before you start anything. A handyman spirit does not a plumber make! If you have questions, you need to ask them. And if you’re dealing with an issue beyond your abilities, we are always here to help. Contact between the wrong pipes is another big mistake that is seen when DIY plumbers don’t thoroughly research a project. Galvanized pipes and copper pipes do not mix unless they are joined with a dielectric union. This common mistake leads to corrosion, and will require everything be replaced! A dielectric union utilizes a plastic sleeve and rubber washer to place a barrier between the two pipes. Improper use of space is a tough issue we have encountered with our customers. Installation projects should be done in a manner that keeps ample space between and surrounding your plumbing. If you are installing cabinets or new pipping in your home be mindful of future repair work or declogging that may need to be done. It is hard to plan for problems that haven’t happened, but keep in mind that clogs are part of the plumbing life! Pictures last forever. Another bit of advice is that when you get into a project, or attempt to fix a leaky faucet on your own, take photos and notes of your step by step progress. That way, you can backtrack when you have to put things back together. Distractions are a part of life, and it’s likely you could be torn away from a project midway through! Using the wrong tools is one of the worst mistakes you can make when doing DIY plumbing repairs. If you choose the wrong tools you can damage your pipes, fittings, and fixtures. Pipes can break if you try to use a common wrench instead of an internal pipe wrench, and that’s just one example of how the wrong tool can create a big problem! As we mentioned, we understand that restless days can lead to exciting ideas and visions of what your bathroom could be. If you are feeling ambitious and need some guidance, we would love to be a part of your dream! Remember to always get the necessary permits, and to call us if you have any problems! 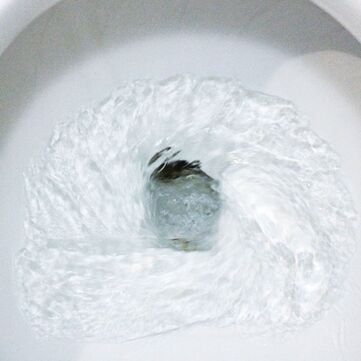 The plumbing inside your home is a delicate system. It only works as well as you take care of it, and since it’s just some plumbing - it’s often easy to forget what proper care looks like. Take the toilet for example. You use it every day, right? That toilet is connected to piping, drainage, sewer or septic tanks depending on the waste management system. It’s a long process, and it’s important to know what you’re sending down the line.
Contrary to common understanding, there are numerous items that are thought to be appropriate to flush that are actually bad for your toilet. We see it in movies, on TV, and read about it in books. We flushed our first guppy after a moment of silence for their passing, and tossed a used tissue in the bowl, neither of which belonged there! This list is brief, but covers the most common items we’ve unfortunately found inside the pipes.
If you’re flushing any of these items down your toilet, please think twice. The only things that should be flushed down the toilet are human waste, and toilet paper. Not only are you polluting your local water systems, but you’re actually damaging your own plumbing! Consider the environment, and your wallet the next time you flush. We know that people make mistakes, so if you’ve accidentally flushed something down the toilet and created a clog we are here to help.  Using the restroom is supposed to be a discretionary function. It’s private, and not meant to be overheard - so what does it mean when your formerly silent toilet starts making a racket every time you flush it? A noisy toilet signifies an underlying issues. Here are a few things to look at and help you weed out the root of the cause before you have to call in an expert!
|
AuthorAt Tony's Plumbing & Heating, we offer outstanding residential and commercial plumbing and heating services in the East Twin Cities metro. With our blog, we hope to bring you useful tips and tricks for ever day life! Archives
January 2024
Categories
All
|
 RSS Feed